Cannabis Growing Tips straight from our Clone Grower, Tyler
A beginner's guide to Growing Cannabis
Spring is here and it’s time to start getting your garden spaces ready! We got together with Paragon Farms (who starts our clones) to compile a list of tips to ensure a healthy plant and successful harvest!
OVERVIEW
Everyone thinks they know the best way to grow cannabis when the truth is, there are a lot of right answers. Types of soil, nutrients, light, and care can all result in incredibly different plants, but at the end of the day- it is called weed for a reason. It is easy to grow, but can be difficult to grow well. Here are a few tips and tricks from Tyler of Paragon Farms to get you started in the right direction.
The fine folks over at Bloom Garden Center in Portland, Oregon are also a wealth of knowledge when it comes to cannabis plants. If you are looking for any extra tips or advice, we recommend a visit to grab your nutrients and ask some questions!
Below we have added links to two of our favorite Cannabis Growing Bibles by Jorge Cervantes, and by Ed Rosenthal: icons in the cannabis industry. When you are ready to take your cultivation to the next level, these books will be an excellent resource!
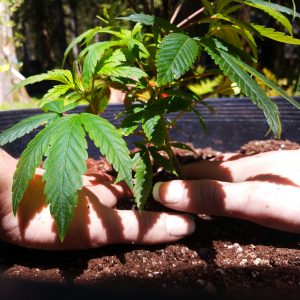
TRANSPLANTING
Water the Day Before
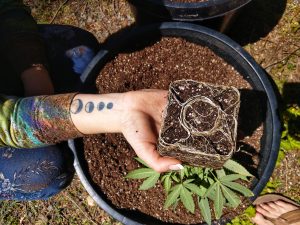
I try and water my clones the day before I transplant and not the day of. Then, I will water the day after I transplant. I believe this small step helps the root system stretch/surge in the new medium searching for water (I only do this when I mix my transplant soil with some water and food in it).
Make sure your New Soil is Moist
Try to add water to your new soil/medium and mix well. My general rule here is if I clench a fistful of soil and let go it should hold that form for a few seconds. This lets me know there’s enough water in the soil, but not too much. If I do the “clench test” and feel the water leaching out of the soil and into my hand, then the medium is over-saturated. Overwatering will slow physical growth drastically.
pH your Water
If you can, always pH your water. Especially since city water is always off and tends to burn plants. Best pH for soil is 6.0-6.7. Coco or fiber mix is 5.5-5.8.When can I put my Plants Outside?
Watch the night time low temperatures, not the daytime highs. Although humidity can play a factor here, the night time lows will drastically slow down the vigor of your plants. I shoot for night time temps at 45° F. Once I see there aren’t any more “cold snaps”- we’re good to go. This will help them spend less energy on combating conditions and more energy on their health and growth (roots and immune system). I see people plant too early every year then spend half of their summer nursing them back to health. Better to plant late than early, that’s for sure.
Minimize Transplanting
Try to minimize the amount of times you transplant your plants. Three times is usually enough to get them to their flower size pot or hole.
Choose your Soil Medium
Choosing your soil medium is a very personal decision. The choices are endless but there are a few tried and true favorites. Our favorite is Live or Living Soil, but you could also choose Cocoa Fibers, Hydroponics, Aeroponics, or some combination of these.
Choosing your Nutrients
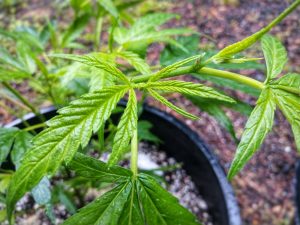
Each strain requires different nutrients. You can research what other growers have said about the demands of the strain you are growing, or you can keep an eye on the leaves and add nutrients accordingly as the plant shows you what it needs. The folks over at Bloom can be helpful here to help find the right nutrient regiment. They were the first garden store to specialize in cannabis growing in Portland. There are also some great resources online to help you deduce what your plant is trying to tell you. Your plant will speak to you with its leaves.
GENERAL CARE
Supporting your Plants
When training/supporting it’s always best to get those stakes, t-posts, or trellis netting (whatever you’re using) in place early on and let them grow into it. This is significantly easier than trying to work them in around an oversized plant.
Top your Plants
Pinching off the top growth on our plant will encourage lower growth, as well as increase budding sites and yields.
Strip your Lower Foliage
Strip all lower foliage late in veg and again at early signs of flower. This will help with air flow through the plant and help it focus its energy on flower production. Remember you’re trying to grow weed not leaves!
Less is More- Troubleshooting
Always remember less is more. If there are issues with your plants and you can’t seem to figure it out, then strip everything back and start with the basics regarding feeding and treatment. This means watering with plain ph’d water, no additives or other food, then slowly adding your base NPK’s and working your way up from there. Same goes for foliar sprays and brewing teas. Each time you step up it will be much easier to pinpoint your issue or mistake.
Garden Pests
There really is no way around it, some unwanted insect friends are bound to find their way into your haven. While some of these bugs can be beneficial in keeping harmful pests away, there are some mites and beetles that are best kept out of the garden. How do we do this organically and safely? Some tried and true methods include adding beneficial insects like Ladybugs and Praying Mantis, or misting with Organic Neem Oil, Cinnamon Oil, Peppermint Oil, and/or Rosemary Oil. All of these have been used individually by different growers to combat pests, but do not spray them on an actual flower- these remedies are for the leaves, stalks, and soil. Remember to never mist your plants when they will be receiving direct sunlight while still wet as this can burn the leaves. We recommend evening as the best time.
JUICING
Juicing cannabis is one of the best ways to take advantage of the natural subcannabinoids that the plant produces, like CBG, as well as take advantage of the benefits of THC with little-to-no-high. Since you will be removing large fan leaves in order to increase flower production, this is a great time to experiment with the benefits of fresh leaf juicing! We recommend adding to your smoothie. You won’t need much- the leaf can be bitter so go easy on it to start. The more resinous the leaf, the more cannabinoids it will carry.
Just because you have the same genetics as someone else doesn’t mean your going to have the same results!
Every element to every environment will be different to some degree. And let’s face it, some people grow better weed than others for any number of reasons. Don’t expect your flower to look, smoke, or smell the same as someone else’s does.
Approximate Timeline
Plants are put in the ground in Mid-April in the Portland Area, weather depending.
Mid-August marks the time when we expect to start seeing our first calyx and buds appear.
Buds begin to grow, remember to keep that leafy foliage trimmed back.
Croptober, or October is normally when we start looking into harvesting our flowers.
Harvesting
Growth times can vary by strain and by geography, however, generally indica strains will flower in 50-60 days and sativa strains will flower in 60-70 days. Because each strain is unique these are generalities and not rules, some sativas can finish more quickly and some indicas can take longer to grow.
Harvesting cannabis at just the right moment helps to maximize the terpene and resin potential of the plant. If you harvest too early and you sacrifice some of that production. Similarly, if you harvest too late, the THC crystals can degrade into CBN (the cannabinoid that puts the plant to sleep), reducing the potential of psycho-activity in the plant.
Curing
When harvesting, try and have a space designated for your branches to hang and dry. The cleaner and darker the space the better.Remove Large Leaves
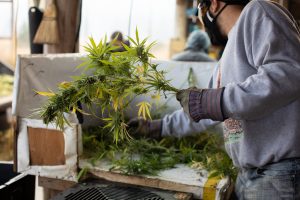
I try and remove about 80% of the fan leaves as I’m harvesting so they stay in the field and not in the cure room. Remember we are growing weed, not leaves! Some leaves are important in the cure process as they caccoon the buds and help protect them from things in the air but the majority of the yellowed crispy leaves can head straight to compost.
Save Your Trim
Once you get to the trimming process we recommend keeping it tight, but not to the point of sacrificing trichomes. Remember to save that trim as it can be used to make edibles, RSO, hash, dabs…pretty much anything!
In Summary

pH your water, and keep well hydrated but not soaked.
Minimize the number of times you transplant your cannabis plant as it stresses out the plant.
Top Your Plants, to encourage lower, bushier growth. Removing large and excess leaves, as well as all lower leaves can also encourage larger buds. We’re growing weed not leaves.
Less is more- if you run into any issues, return to just water for a short time and then slowly reintroduce your NPKs.
There are many organic pest control methods to try, but never spray on plants while in direct sunlight.


Leave a Comment